Note: This article is second of the multi-part SwiftUI tutorial series; if you haven’t read the first article, click here to open, and if you don’t want to go into that hassle click here to download the project.
If you are a beginner and you find it difficult to understand things written in this article. Feel free to ask questions on my Reddit page or Twitter. Remember, you can do it. ; )
Let’s Start
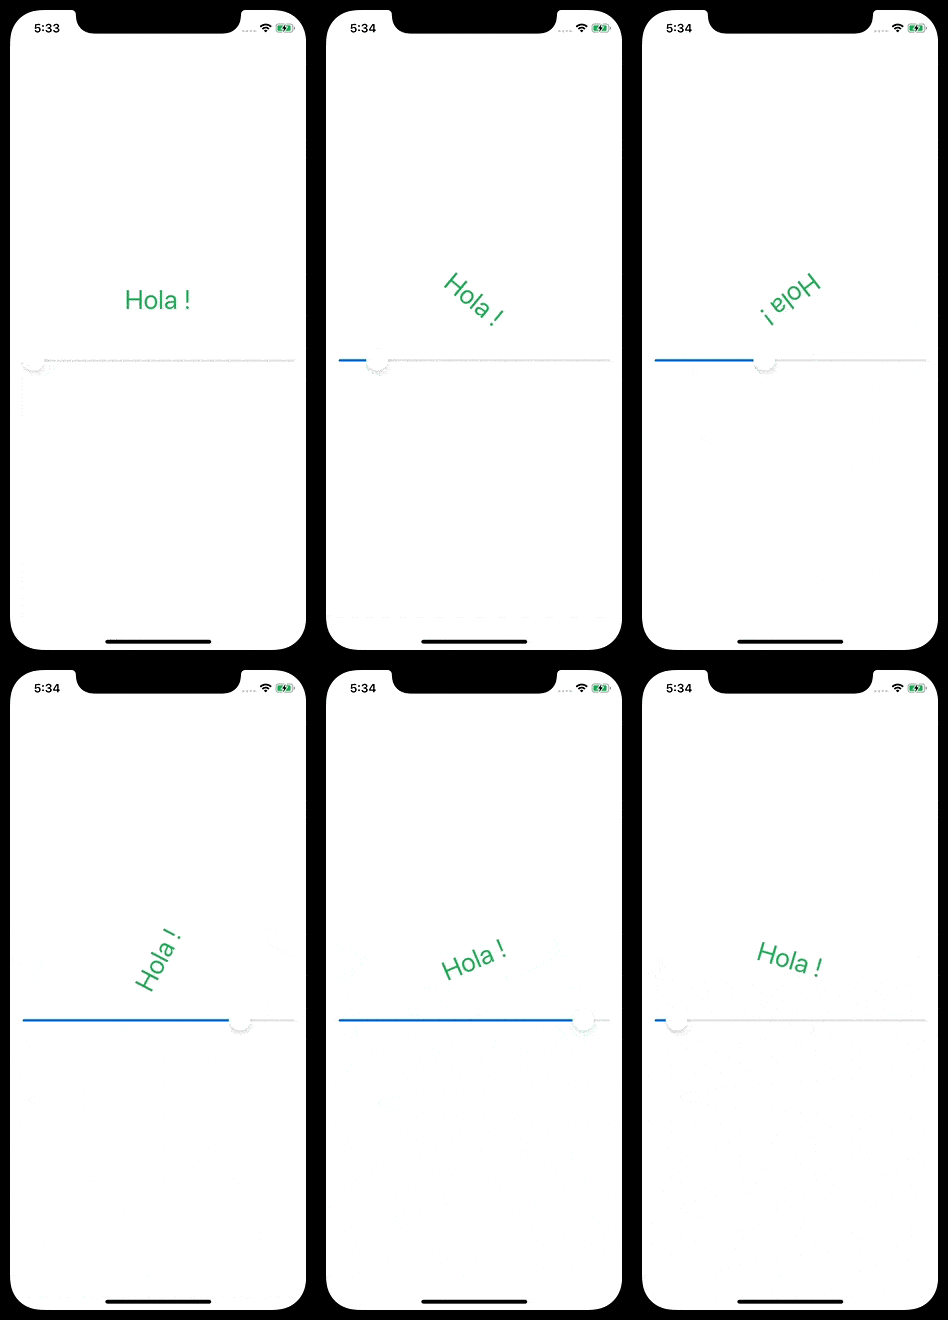
In this article, we will be playing with our Text here, which says “Hola !”, making it rotate 360 degrees on the movement of our slider. On the completion of this article, you will learn what Modifiers are and how to use your Canvas to run your application and more. There’s always a “more” ; ).
As of now, your ContentView.swift file should look like the code mentioned below:
import SwiftUI

struct ContentView: View {

    var body: some View {
        Text("Hola !")
    }
}

struct ContentView_Previews: PreviewProvider {
    static var previews: some View {
        ContentView()
    }
}
For now, we will work on the first struct, which conforms to the View protocol. Besides, the second struct is all about debugging; I know debugging sounds dull, but with SwiftUI previews, trust me, it isn’t. I’ll be dedicating another article to this second struct and get in-depth with you guys. So please keep reading, and don’t forget to subscribe.
Modifier
Modifiers in SwiftUI are used to customize the look or behavior of the view.
Now, let’s change the color and font of the text. Replace Text in the struct with the code mentioned below
Text("Hola !")
  .font(.largeTitle)
  .foregroundColor(Color.green)
Notice, your text changed to green, and your text is enormous in the Canvas, the two functions added above font(.largeTitle) and foregroundColor(Color.green) are called Modifiers in SwiftUI.
Next, let’s embed our Text view in VStack. Command + Click on the Text in Canvas, and you shall see a pop-up looking just like the one in the image.
Notice, in your ContentView.swift file, your code is changed, and the Text is embedded inside VStack,
Now, in the struct above the body, add the line mentioned below.
@State private var degrees: Double = 0If you are an iOS developer, you will be able to understand the code mentioned above except the @State property declared with it.
@State is a unique property, and SwiftUI manages its variables. All the variables declared with @State property are used by SwiftUI to observe when they are read and written, and accordingly, SwiftUI takes action if required.
Whenever the value of the variable associated with @State is changed, the view is invalidated and reloaded.
Rotate
Now let’s add a new modifier to our Text, modify your code so that it matches the one below.
Text("Hola !")
  .font(.largeTitle)
  .foregroundColor(Color.green)
  .rotationEffect(Angle(degrees: degrees))
Here, the rotationEffect modifier is taking a degree value from the variable we just declared above the body of the struct.
Next, we need to add a Slider with a range of 0 - 360 in our VStack, just below the Text declaration, and your body now should look like the code shown below.
var body: some View {
        VStack {
            Text("Hola !")
                .font(.largeTitle)
                .foregroundColor(Color.green)
                .rotationEffect(Angle(degrees: degrees))

            Slider(value: $degrees, in: 0...360)
                .padding()
        }
}
Voila! You have just coded your First iOS App. Now, let’s see the rotation in action.
There is a Play button with a play icon just next to your preview in Canvas on the bottom right. (For reference see the image). Click the play button, and wait for a few seconds as the Preview will load the app to run.
As soon as your preview is loaded, drag the slider and see for yourself the magic of SwiftUI. The same in UIKit would not have been so easy.
Tips
Command + Click on the Text in Canvas, choose “Show SwiftUI Inspector” and add new modifiers. There are so many things you can do right here, add shadows to your text or add a Navigation View. Let me know in the Comment section about what modifications you did, and I’ll be glad to hear.
To explore more View objects, click on the Library button, one on the top right-hand side in your Xcode with a “+” symbol.
Last but not least, don’t forget to subscribe. There’s more coming and it’s never-ending. ; )
The next article is available here (SwiftUI - Exploring Modifiers and Previews).
Click here to download the final project.
If you have any suggestions or questions, Feel free to connect me on Twitter. 😉


